If you've mistakenly lost your iPhone and fractured the screen, don't run scared! Changing an iPhone monitor is simpler than you could assume. With the appropriate tools and a little bit of determination, you can easily have your iPhone looking as really good as brand-new in no time. In this step-by-step manual, we'll stroll you via the procedure of changing your iPhone display in 10 minutes or less.
Before we begin, it's essential to keep in mind that this resource applies to the majority of iPhone styles, consisting of the newer ones like the iPhone X and XS. Nevertheless, if you're not sure about whether this manual is suitable for your details style, it's consistently a good concept to examine along with Apple or speak with a specialist.
Without additional ado, allow's get started!
Action 1: Gather the essential resources
To change your iPhone monitor, you'll need a handful of resources:
1. Substitute display set (help make certain it's appropriate with your particular version)
2. Screwdriver set (including a pentalobe screwdriver)
3. You Can Try This Source . Tweezers
5. Plastic pry tool
You can conveniently find these tools online or at neighborhood electronic devices establishments.
Measure 2: Power off and get rid of SIM card
Prior to going ahead along with any sort of fixing job on your iPhone, make certain to power it off entirely. This will definitely avoid any type of unexpected harm while working on the unit.
Furthermore, clear away the SIM memory card holder utilizing a SIM memory card removal device or a paperclip.
Measure 3: Clear away screws and show setting up
Making use of the pentalobe screwdriver, very carefully get rid of the two screws located at the bottom of your iPhone.
Next, use the suction mug to raise up the screen installation a little. Inserting a plastic pry device between the framework and screen installation can easily aid loosen up any sort of glue keeping them all together.
Gently elevate up on the screen assembly from both edges, rotating it up from the base, and carefully get rid of it.
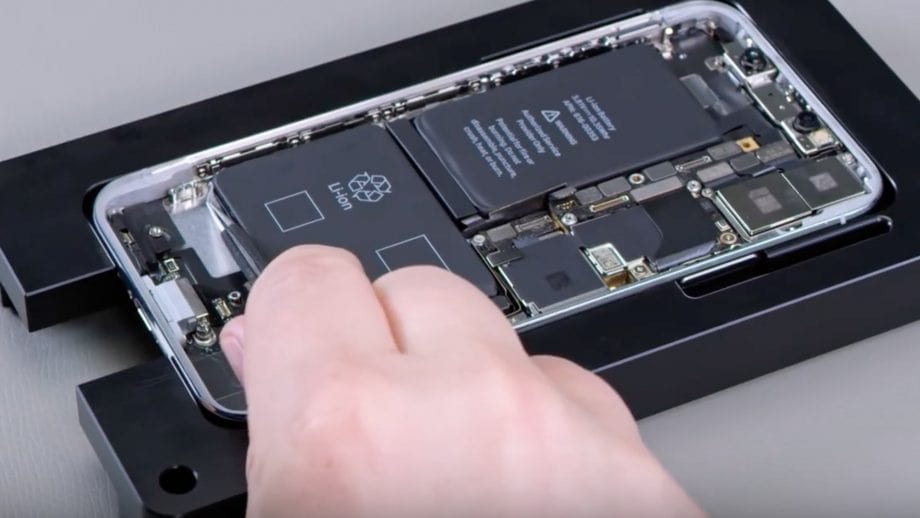
Step 4: Disconnect cable televisions and get rid of outdated monitor
Once the show setting up is gotten rid of, you'll need to disconnect three wires that are storing it in area. These cords handle the touch display, display screen, and front cam.
Making use of a tiny screwdriver or tweezers, very carefully separate these cables one through one.
After detaching the wires, eliminate the old monitor from your iPhone.
Action 5: Set up brand new display
Take your replacement screen set and meticulously align it along with the phone's framework. Produce certain all adapters are effectively edged up along with their particular slots.
Carefully push down on the replacement screen to secure it in spot.
Action 6: Reconnect cables and reassemble
Right now it's time to reconnect the three cable televisions that were separated previously. Very carefully affix each cable back into its corresponding slot.
Once all of the wires are connected, lesser down the show assembly onto the framework. Make certain that it rests flush with no gaps.
Lastly, use your pentalobe screwdriver to return and tighten the two screws at the bottom of your iPhone.
Step 7: Energy on and check
With everything reconstructed, electrical power on your iPhone to guarantee that everything is working as expected. Examine both contact functionality and present p